Setting up ubiquity robotics ur50 lidar
↑top
In this document it is described how to set up the ur50 lidar on the Magni.
Mounting the lidar
Before doing anything with the electronics, the robot must be powered down and THE BATTERIES DISCONNECTED.
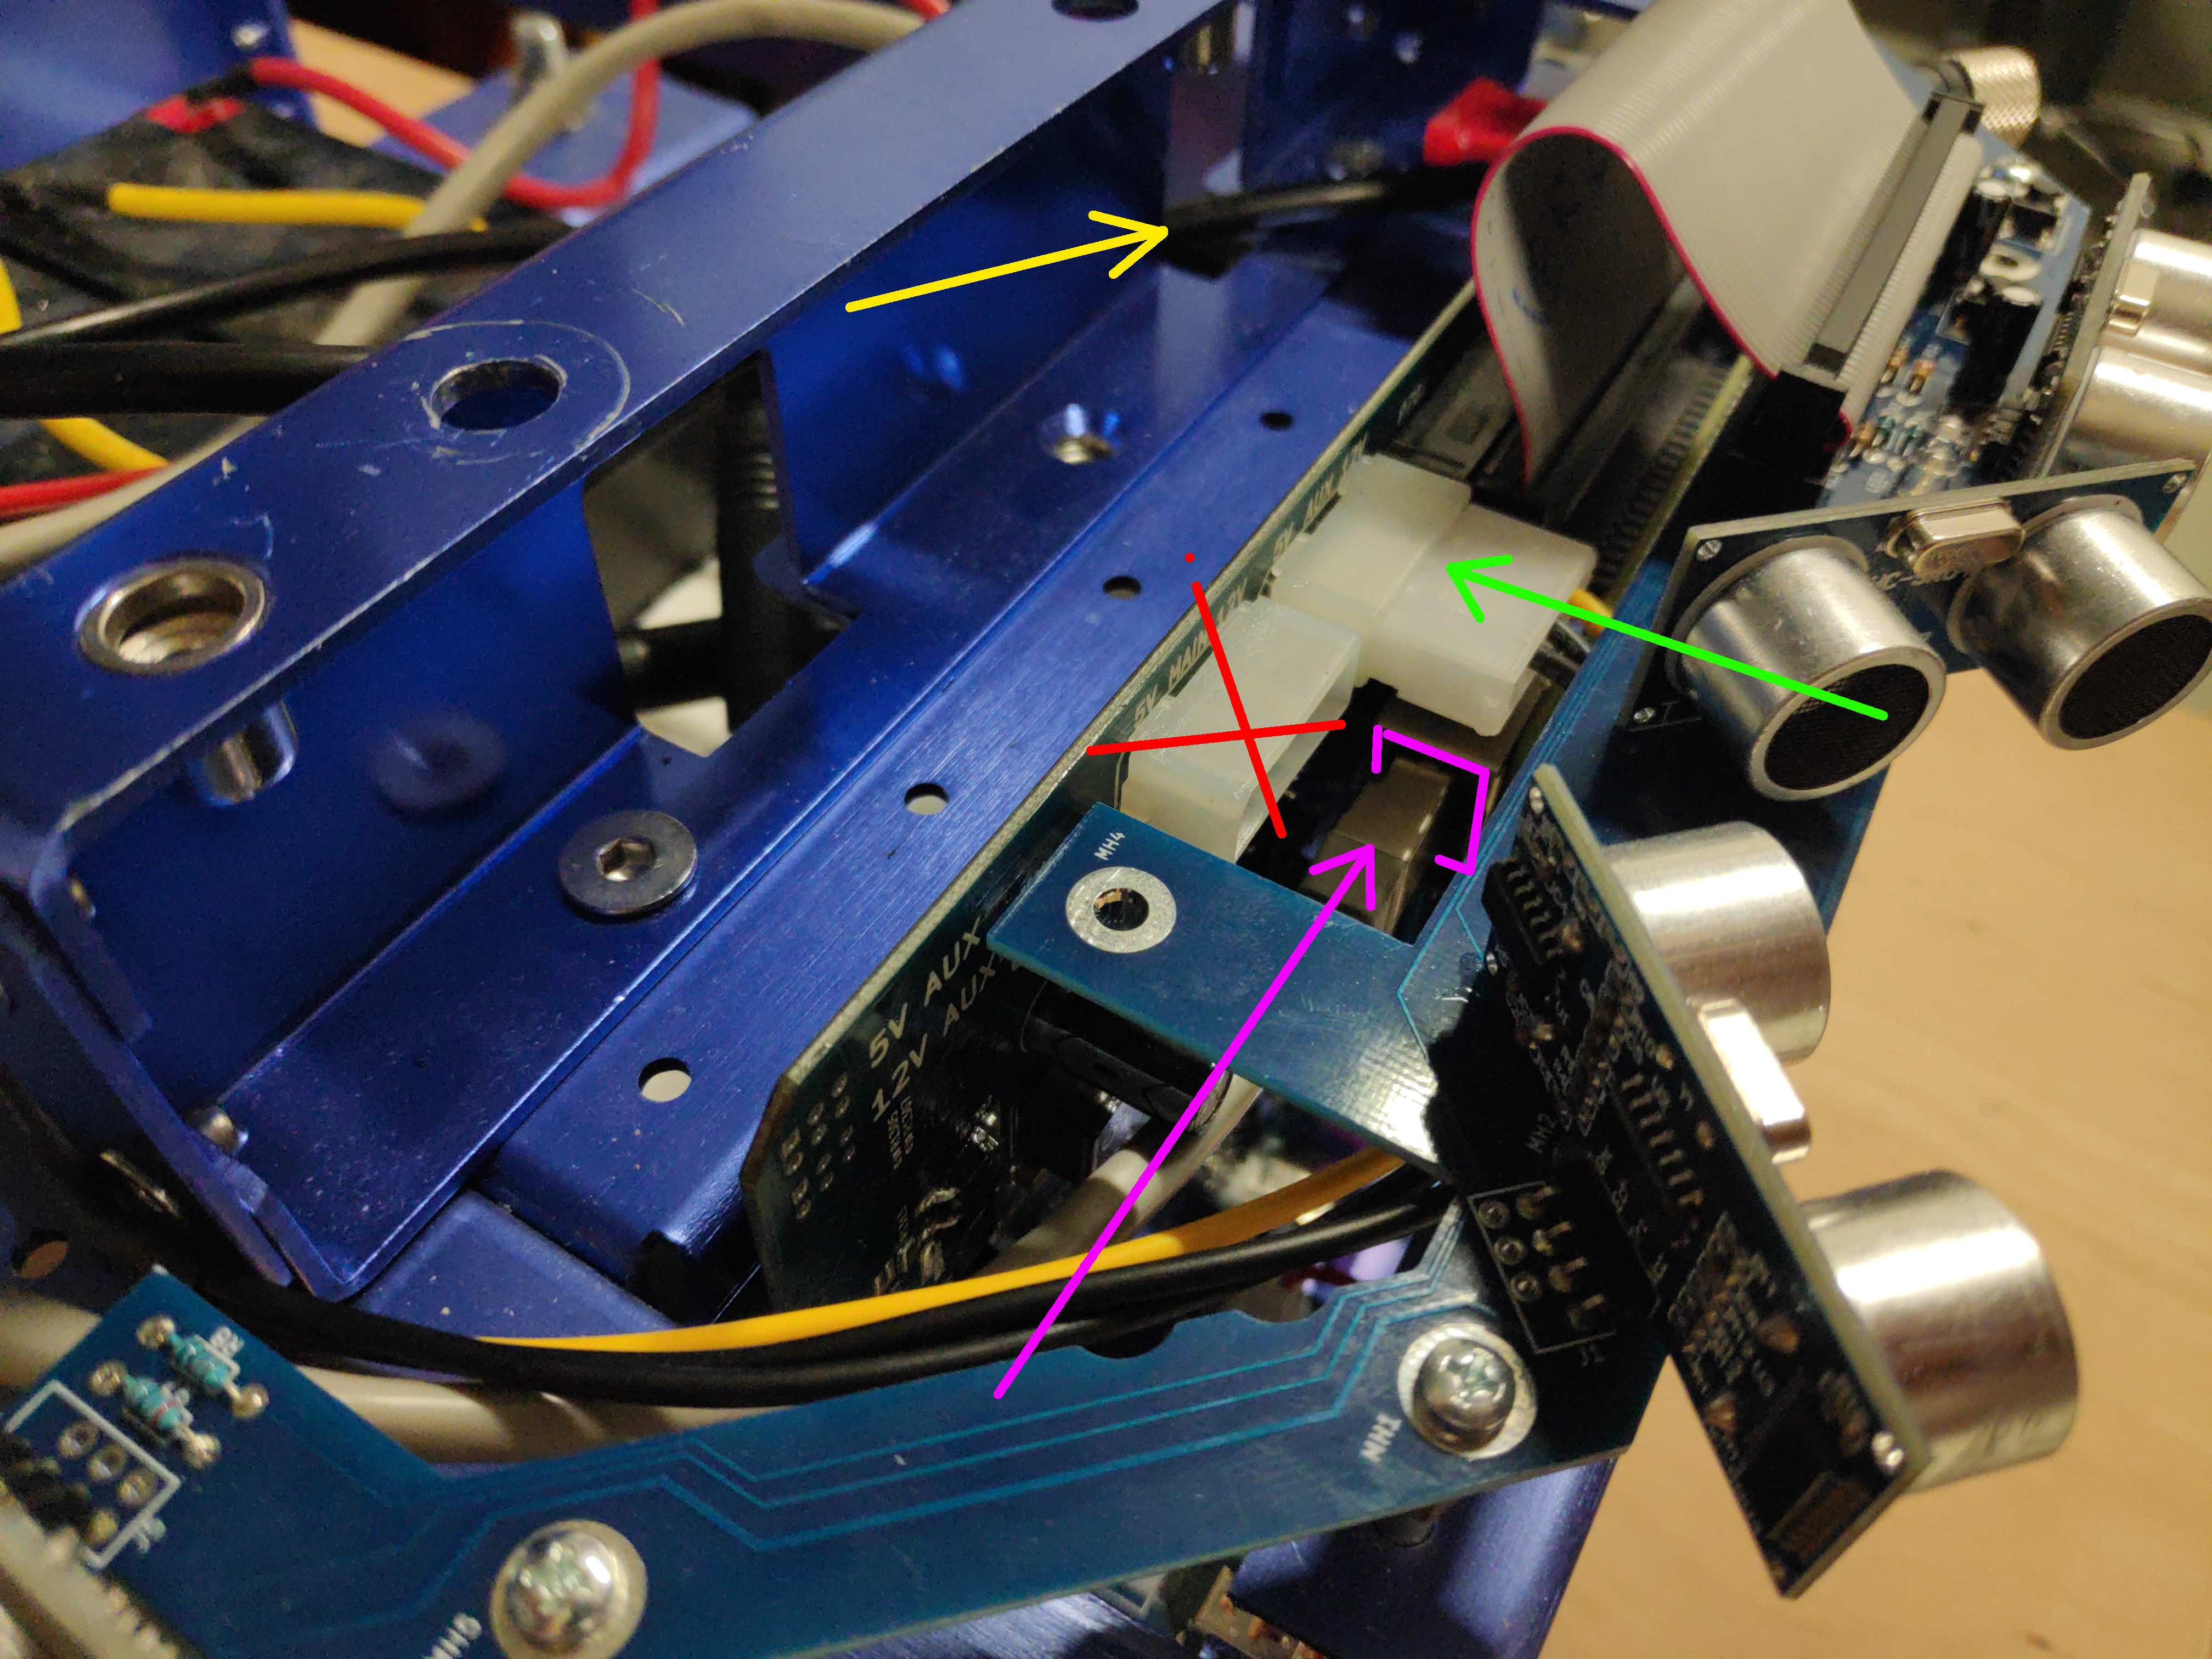
Connect the lidar lan cable into Raspberry Pi lan port and the power supply connector into the right molex connector on the MCB board:
Using 4xM3 screws, the lidar can be mounted on the top plate that comes with Magni robot
Now the batteries can be reconnected and the robot powered on.
Default location
The default location of the lidar is on the top plate looking into the forward direction (lidar connector is turned backward). Top plate of newer robots comes ready with holes for lidar mounting. But some of the older versions don’t have those holes. In that case please either contact Ubiquity Robotics to supply you with a new top plate OR use double sided tape to mount the lidar. If you chose to mount the lidar with the double sided tape please make sure its 1.) turned exactly forward - a slight offset in angle can result in inaccurate localization and 2.) its center is EXACTLY the position shown on the picture.
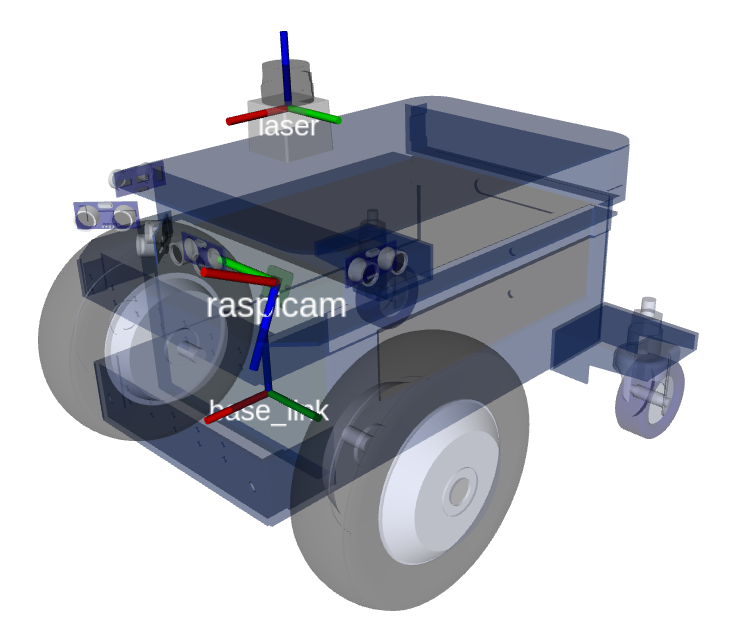
On the picture red, green, blue correspond to x, y and z axis. Lidar is the component that says ‘laser’ on the image (lidars are sometimes also called lasers)
Advanced: Changing LIDAR internal IP settings
Warning: IPs are changed from their defaults, it is highly likely nothing will work out of the box with Ubiquity Robotics products.
If buying a lidar from Ubiquity Robotics, the lidar will come pre-set with the IPs that were used in these tutorials:
- LIDAR IP: 192.168.42.222
- IP to which lidar is connected (workstation IP): 192.168.42.125
If you want to change those lidar-internal IPs here is a video about how to do that.
Additionally to whats shown on the video, make sure:
- First make sure you have WinPcap installed (sourced here or download from the internet)
- Follow the steps shown on the video to change the LIDAR IP, but a couple of notes: - in the video PC IP is changed from 192.168.1.125 to 192.168.42.125. This was done because often external network is also on the subnet 192.168.1.xxx and this creates problems with the internet connection. - in the video the IP is changed to 192.168.42.125 -> this is arbitrary and can be any IP
Next steps
If your base image is running Ubuntu Focal and ROS Noetic follow tutorial: Setting up magni-default lidar Noetic
If your base image is running Ubuntu Xenial and ROS Kinetic follow tutorial: Setting up magni-default lidar Kinetic (will be deprecated soon)